
Halloween Cleaning?

Many people feel perfectly comfortable maintaining their own home on a regular basis. But there are times when our schedules can get overwhelming or major changes occur in life that just might require that we seek help with cleaning our homes. If you ever feel like scheduling a once in a while cleaning, you are not alone. Only a small percentage of Americans have a regularly scheduled housekeeper. Below, you’ll find some instances where it may benefit you to consider hiring a cleaning service.
Expectant Moms
As the arrival of a new baby nears, it may become more difficult to physically complete the day-to-day chores. Many moms-to-be might even find themselves “nesting” and wanting to add the final touches to the nursery, or readjusting furniture throughout the home to fit the new arrival. This may be a crucial time for the family to rely on outside help so that they can instead focus on other details such as adjusting to and preparing for the new changes in their life.
Surgery Or Short Term Disability
Though friends and family members will likely step in to assist with daily activities, do yourself and them a favor and save the hard stuff for a professional. Your loved ones will appreciate being spared the messy stuff.
Extended Guest Visits
It may be a good idea to consider hiring a professional cleaning crew to help prepare for an extended visit. While it’s true that we may have a guest room ready for guests to temporarily reside in, very often this room is overlooked during the dusting or vacuuming simply because it isn’t used often. Even though the room isn’t being used, dust or pet fur can still travel in this room via cracks in the doorway or even air conditioning/heating vents. Worse yet, one thing we don’t often consider is how this room might be the most comfortable dwelling in the house for creepy crawlies due to the lack of human traffic. Think about it … if you were a spider, wouldn’t hiding under that warm, fluffy, undisturbed pillow sound cozy?
Extended Guests Depart
Of course it would make sense to hire a group of professionals to help with the cleaning details once guests have left. Not only will the guest room require a detailed cleaning job, but your guests are surely to have used your bathrooms, kitchen, and family rooms as well.
Holidays—Before And After
Let’s be honest, preparing for the holidays can be time-consuming and although fun, it can also be quite stressful. Between decorating, planning parties and meals, gift shopping, and preparing for guests, all while trying to maintain your regular schedule, it’s safe to say that it’s not just the time change that makes our days feel shorter! Save yourself some of the stress and hire a professional cleaning service to alleviate some of the stress so you can focus on a dazzling and fun holiday season for you and your guests.
Have you found other times in your life when you realize that hiring a cleaning service is more convenient for you? Let us know!
When it comes to housekeeping, it’s fair to say that in all likelihood, it’s probably on the bottom of the list of things you’d rather be doing. There may also be some hesitation due to privacy concerns, fear of loss, or financial reasons. This is when using a Housekeeping Referral Agency can benefit you. As opposed to picking a random name out of the phone book, an agency can provide you with a reputable housekeeper that comes highly referred by clients and others in the industry. You can rest your fears aside and trust that the housekeepers referred to you have many years of experience and are completely reliable.
If you’re still on the fence as to whether or not hiring a housekeeper is right for you, read on to find out more of the many reasons why people opt to outsource their home chores.
Save Time & Energy
After a busy work week and full weekend filled with social activities, who has the desire to spend their free time cleaning their house? Take the time to unwind, read that book you’ve been meaning to get to, go on a hike, or whatever it is that makes you sigh with contentment while someone handles those tedious tasks for you!
Save Money
Yes, you read that right! Believe it or not, hiring a housekeeper will save you money. You’ve heard the phrase “time is money.” Well, consider how valuable your time is and how much money/time you’re throwing away when you’re dusting, mopping, scrubbing, and more. Not only will you be saving time and money by hiring a professional to clean your dwellings, but you also have the opportunity to focus on other tasks that you simply do not have time to do when you are cleaning your home yourself. If you’re curious as to whether it’s financially worth it to hire a housekeeper, do the simple math: calculate your hourly rate times the number of hours it would take you to do your weekly chores.
You Don’t Like Cleaning
We’re not all cut out for removing cobwebs or scrubbing toilets. Save yourself the pain of doing those icky chores and hire someone else to do it for you instead. Or focus on the chores you don’t mind doing and have the housekeepers focus on the ones you dread!
Professional Help = Professional Results
Housekeepers are experts in cleaning even the toughest jobs and are equipped with years-long practiced knowledge that will lead to your home looking and feeling like your own perfect sanctuary. Whether your preference is to use commercial chemicals, or you opt to go with a more natural, environmentally friendly approach, there is no task that housekeepers can’t handle.
Customize Cleaning Needs
Maybe you don’t mind changing your bed linens, but you absolutely dread cleaning your stove. Housekeeping services offer a variety of options to help you get your home back in top shape. From small scale jobs such as vacuuming and dusting to more intense projects such as carpet cleaning and window washing, no two homes are the same. Work directly with your housekeeper to create a customized cleaning plan to meet your needs.
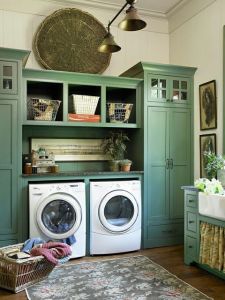
As promised here is another handful of housekeeping tips to reduce the time you spend in the laundry room.
Now, it’s your turn. What makes “laundry day” easier for you? Please share.

As the summer is approaching rapidly, we all get swept away with vacations, managing busy schedules, and taking children to and from activities. Here are some tips to keep up with self-love and self-care.
Simplifying shouldn’t be complex. Little changes in both behavior and thoughts make the greatest impact. Here are a few steps to help get you started.
While you take care of your mind, let The Clean Sweep, an East Bay referral agency; take care of your household needs. We are here to support you, from a traditional housecleaning to window washing, to move in/move out cleaning.

We’ve just come through the busy bliss of the holidays and often times – our bank accounts, nerves, and homes reflect it. With the New Year comes New Year’s Resolutions and one of the famous ones is the resolution to keep a clean home. For some, this can be a daunting and time consuming task and that’s why The Clean Sweep is here to help. In addition to professional help, our housekeepers have crafted a list of things that can help you clean your home one step at a time.
Donate – As you’re going through the house, it is almost guaranteed that you will find some things that are no longer useful or necessary, these items are perfect for donation! Gently worn clothes, toys, and shoes, are perfect items for donation.
Throw out – Get rid of items that are no longer useful to you – and that would not be useful for others. If you longer need something, or if it no longer has a place in your home, get rid of it.

I don’t know about you, but the holidays always sneak up on me every year. No matter how early, or how late I start, there is always someone that I forgot to buy a gift for, or in making my grocery list – there is something that I left off. Can you identify with my angst?
So. after Christmas last year – I made a list of everything that I needed to remember for Christmas this year. It has made such a difference in how I approach the Holiday season, so I thought that I would share it with you.
Now, the most important step: record your answers, ideas, etc and put them somewhere safe! So that when next year comes around, you will be a pro. I think that these tips are rather useful and may I be the first to wish you Happy Holidays, 2015!

Houses seem almost magic during the month of December, with seasonal music, warm blankets, and family surrounding you – being at home is the most enjoyable thing to do. When you’re cozying up on your couch with a hot tea and a good book, we want cleaning to be the last thing on your mind. While The Clean Sweep Housekeeping Agency offers many services to assist you during this wonderfully busy season – but here are some tips our housekeepers recommend in between housekeeper visits.
Start with the most difficult room and make your way back to the easiest room. Additionally, set at timer and stick to it – it will make your cleaning more efficient and give you more time to do other things
Always save sweeping, vacuuming, and mopping until the very end. It will make your house smell, appear, and feel clean.
This is a season full of guests, so in order to make sure that your guests are seeing a clean house – stand in your front door and identify cluttered or problem areas and tackle those first
Our housekeepers cannot emphasize keeping a clean bathroom when hosting an event. Start with the mirrors, wipe down the counters, and scrub the toilet clean
The holiday season is one of the busiest seasons of the year and there is essentially no time for de-cluttering. Therefore, find a quick place to store all unwanted clutter and pick a date to go through and clean it out once the holiday rush is over
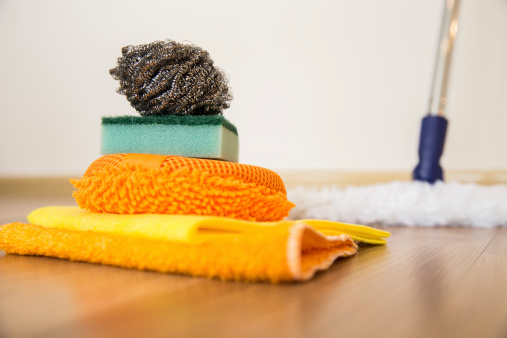
Our housekeeper understand how daunting after party clean up can be. Especially after dinner – dishes, pots, and pans seem to form mountains in sinks. One highly recommended tip is to purchase a stainless steel sponge (a sponge made of stainless steel, not made for) and let dishes soak for about 10 minutes before scrubbing them down with your sponge. This trick is guaranteed to save you time and stress
Here are a few of our favorite time-saving tips. Because we know that even if you have professional housekeeping help there’s still plenty of things to do in between visits.
Okay, that’s the dozen for the day. What housekeeping tips can you add?
Bathroom cleaning is essential part of maintaining a clean house, everyone can agree with that. But it doesn’t have to be such a big chore, if you take it little by little.
All of these things can easily be done in just a couple of minutes each day. They’re simple and easy to do and will leave your bathroom looking fresh and clean!
The following tips are primarily for those of us who do not have professional housekeeping help. If you do have outside help, we recommend that you refer to our post – “Speed Cleaning Tips: Cleaning in Between Housekeeper Visits“
Our housekeepers recommend that you commit these principals to memory, practice them. Once mastered, you will be amazed at your proficiency and efficiency. You are sure to dazzle and amaze your friends and your family.
Anyone, yes, anyone can master these fundamentals. Try them. Adapt them. You’ll see a difference.
Sometimes, even the smallest changes will pay off Remember, every step pays off in greater speed and less fatigue.
But always remember – a super clean “you-can-eat-off-the-floor” house is NOT the most important thing in life.
Over the years, it has been our pleasure to represent housekeepers from nearly 20 different countries. Often times, they have been well-educated: doctors, lawyers, bank administrators, teachers, and so forth. However, their English speaking skills were not good enough to pursue their former careers. Without exception, we have found them to be conscientious, dedicated, and willing workers!
When dealing with housekeepers who do not speak English it can be a little frustrating. So here are some tips to make communications a little bit easier:
Overall, although the communications gap can be difficult to over come, treat your housekeeper with kindness and understanding, as they truly are doing their best to please you and meet all your needs.
If you read our previous post, I’m pretty sure you don’t think mold is a good thing (except in a few select cheeses such as Brie and Gorgonzola. Yum.) But how do we keep mold from growing on food?
You may think refrigerating fresh produce is the best way to deter mold, but that’s actually the opposite of what you should do in many cases. If you the berries you bought at the supermarket were in the refrigerator case, pop them in the refrigerator as soon as you get home. If you bought tomatoes at room temperature, keep them out on the counter.
Exposing foods to different temperatures and changing levels of humidity can encourage mold growth.
Remember the old adage, “One bad apple spoils the whole bunch”? Well, it happens to be true, but as I write this it seems pretty stupid, because apples don’t come in bunches, do they? But I digress. If you are given to buying produce by the box or bag–think Costco size–it’s best to bring it home and spread it all out and inspect each one for discoloration or mushy places. Throw any offenders into the trash, because they really will contaminate the whole bunch.
It is not a good idea to buy berries of any kind in bulk unless you’re going to use them right away. Their soft skin and high moisture content make them especially susceptible to mold. Buy only as much as you can use in the next few days. And inspect the whole container before you use them.
Check the rubber door seal of your refrigerator. If you see any telltale grey, wash the seal with a 50:50 vinegar and water solution. Rinse thoroughly. Also pay particular attention to any drawers or containers that have had moldy food in them.
Okay, so these last two posts have been kind of, well, yucky. I’m not having any fun writing them either, if truth be told. But this is all a part of housekeeping. So we hope it’s been helpful. If you’re just not “into” cleaning out your refrigerator, call a good housecleaning service and have them do it. All the housekeeping tips in the world won’t substitute for getting the job done.
It seems like every time we turn around someone is telling us how very afraid we must be. Or is it just me…?
But if you or another in your house suffers from asthma, sinusitis or allergies; or has a compromised immune system due to chronic illness (especially of the lungs), chemotherapy, etc. you do need to be very afraid of a danger that lurks in your refrigerator. Namely, mold. You know, those greenish or blackish spots on top of the sour cream, the nasty grey fuzzy on your tomato.
Mold can also be growing without the telltale spots. Yogurt, for instance, with a swelled container or slightly mildewy or fermented smell or off taste may well be moldy and can be particularly dangerous. And it can literally grow overnight.
Some mold species even produce poisonous substances called mycotoxins. The most dangerous of these is aflatoxin which is principally found in peanuts and grain in developing countries. But if you buy a bag of peanuts and notice a moldy smell or blackened areas on any of the nuts or a foul taste, throw them away! Aflatoxins are nothing to fool around with.
Now, no one likes to throw away food if they don’t have to. It’s tempting to just remove the offending spots and eat what’s left. And sometimes you can do that. For instance, it’s safe to trim off mold on hard foods such as cheddar cheese, just cut off at least one inch all around the spot; but be sure to keep the knife away from the mold so it doesn’t contaminate the rest of the food. The rest of the cheese is fine to eat.
But molds are filamentous organisms, which means they can have long thread-like filaments which can grow under the surface that you can’t see. These threads grow rapidly in foods that have a high liquid content. So it’s better to throw out the whole container rather than taking a chance. The same is true for bread. If one piece has mold on it (and just why is it always just one piece?) throw out the entire loaf.
Housekeeping entails so many things. Keeping the refrigerator clean and organized is just one small facet. And when we’re super busy it’s easy to neglect those things behind closed doors. But dealing with mold is more than just good house cleaning. It can be a matter of health.
Our next post will talk about preventing mold in the first place. It’s worth a read.
Please, as always, weigh in on your experiences, suggestions or–God forbid–criticism.
The one overarching, guiding principle in making quick work of housekeeping is this: Neatness Counts! Neat and not-so-clean beats clean and not-so-neat every time. Even our housekeepers have been fooled by a neat house that looks clean even though layers of dirt may be hiding most everywhere! So pick up. Hang up. Straighten. De-clutter. You’ll be well on your way to a great looking house.
Each of these tasks take a minute or less, but oh, what a difference they make. Try it.
Disposable wipes make everyday house cleaning a breeze. And of course they’re indispensable for baby bottoms! But please don’t flush them down the toilet– even if they are labeled “flushable.”
The label simply means they will go down your toilet when flushed. What you need to be concerned about is what happens next.
Unlike toilet paper, wipes do not disintegrate in water. They stay pretty much intact as they travel through the sewer pipes and can get caught on roots or other debris, increasing the likelihood of a clog..
So, throw away any cleaning/disinfecting wipes, moist towelettes, personal hygiene products, etc., in the trash, never in your toilet. Clogged sewer lines are ugly and expensive to fix. Trashing disposable wipes is such an easy way to prevent trouble.
Anti-bacterial soaps and cleaners have become quite the rage (read “marketing success”) haven’t they? And it sounds so good. I mean, who doesn’t want to avoid germs these days?! I mean, what’s a clean house all about?
But what if I told you that anti-bacterial soaps have not been proven any more effective than regular soap in preventing infection among average consumers? Would that make you stop and think? Okay, so what if I also told you that the substances that make a soap anti-bacterial are actually herbicides, pesticides and fungicides? Would that make you say, Whao?
Some of these “active ingredients” have been linked to some serious health problems including liver, kidney and digestive damage; behavioral problems in children; damage to the nervous system; and brain development and reproductive defects. Even more, overuse of these products can impair the body’s ability to fight off common infections.
The bacteria fighting agent, triclosan, is of particular concern. Unfortunately it is in all kinds of products from liquid soap to acne creams, toothpaste (!) to deodorant, and a slew of household products besides. Look for triclosan on the labels of things you buy. It may also be listed under the brand names of Microban, UltraFresh, Amicor and BioFresh. There’s a slew of information on the web about triclosan, but suffice it to say here, You don’t want it in your body if you can help it.
So, do you ever need to use anti-bacterial cleaners? According to leading microbiologists, they are needed only when someone in a household is seriously ill or has low immunity. Otherwise, plain old soap and warm water will do just fine.
What can you use instead? For house cleaning, try soap and hot water, hydrogen peroxide, vinegar, alcohol or lavender oil either by itself or suspended in a solution of mineral oil. For hand soaps, try Trader Joe’s “Next to Godliness.”
Hope this helps. Love to hear your comments!!
How much you clean between housekeeper visits depends on three things: 1) how often you have housekeeping service 2) your standards for an acceptably clean house and 3) the number of high maintenance items you have, like clear glass shower doors, for instance. But most people find they don’t need to do a lot of cleaning in between times.
We realize there may be other things that are important to you to do between housekeeper visits, but these are the basics.
Comments? Please add them below. We love to hear from you.
Not long ago we came across the following words by one Henry Giles. Since he wrote more than 100 years ago he addressed his remarks to men only. We’ve taken the liberty of changing the gender for our purposes here.
“Women must work. That is certain as the sun. But she may work gratefully…. or she may work as a machine. There is no work so rude, that she may not exalt it; no work so impassive, that she may not breathe life into it; no work so dull, that she may not enliven it.”
Take a minute to ponder the implications of those words for all the work you do.
What is your attitude towards housework? The very thought of it makes many a woman shudder. Drudgery. Boredom. Thankless. These are but a few of the words that may spring to mind. On the other hand, in our business we often hear the housekeepers we represent apologize for liking to clean. “I know you will think I’m crazy…,” they will say, or “I hate to admit it, but….” It’s as if they are confessing to some gross personality disorder.
But, whether you love it or loathe it, there are probably times when your attitude towards house cleaning could stand a little adjustment. If we can learn to enjoy house cleaning more, chances are we will do it better and faster. Housework may seem dull, but with a little wit and imagination we can enliven it.
Cleaning is great exercise. Vigorous house cleaning gives your whole body of work out. If you become conscious of how you are moving, you could work on toning specific muscle groups. It may not replace your regular exercise program, but look at how much you’re accomplishing at the same time.
It can challenge your ingenuity. Think in terms of time-saving, energy-saving, and money-saving techniques and you’ll be amazed at how many new ways of doing things you will come up with.
You can gain a sense of accomplishment. Psychologists tell us that one of the major causes of job dissatisfaction in the modern world is that most people are involved in only small segments of any given job or project; they seldom see the whole. Thus, there is little feeling of pride or accomplishment. But whether you clean one room or the whole house, you have accomplished something tangible, you can see the results.
Housework is a change from the mental to the physical. A nice change of pace, especially if you sit at a desk all week.
Cleaning can provide the opportunity for meditation. Yes, it’s true! There is an aspect of yoga called “housewives meditation”–no, really! This comes about when you are so into the task at hand that you almost become a part of it. Anyone can do it with a little practice, and you will find it a refreshing, revitalizing experience.
You can use your housework time for planning, thinking through problems, dreaming. With our hectic pace, we never have enough time for thoughts such as these.
You can no doubt add ideas of your own to this list. And that very process will make your cleaning time more enjoyable. Try it. You’ll see.
If you live in the San Francisco East Bay, call The Clean Sweep. We’ll transform your house without you so much as lifting a finger! Our housekeepers have a great attitude towards house work!
Comments? Questions? We’d love to hear from you.
.
